New floors on your mind? Laminate’s a smart pick. Looks great. Takes a beating. And yeah, you can totally lay it yourself. But hold up. It’s not always easy. We’re going to show you how to install laminate flooring. Right. On concrete. On plywood. Even those pain-in-the-neck stairs. Every single step. No faking it’s simple. Just making sure you can actually get it done.
You might be wondering how hard it is to install laminate flooring. Or, how much does it cost to install laminate flooring if you hire someone? We’ll get into all that. This guide is your straightforward roadmap. No fluff. Just the real steps. For beginners and anyone looking for solid advice.
A new floor often sparks other ideas, right? Like a whole kitchen or bathroom overhaul. If that’s you, check out DayBrook Homes. They’re great at stunning remodels.
Getting Ready for Your Laminate Project
Before you even think about cutting a single plank, you need to get prepped. This stage is crucial. Skip it, and you’ll regret it. Seriously.
Picking Your Planks: Not All Laminate is Equal
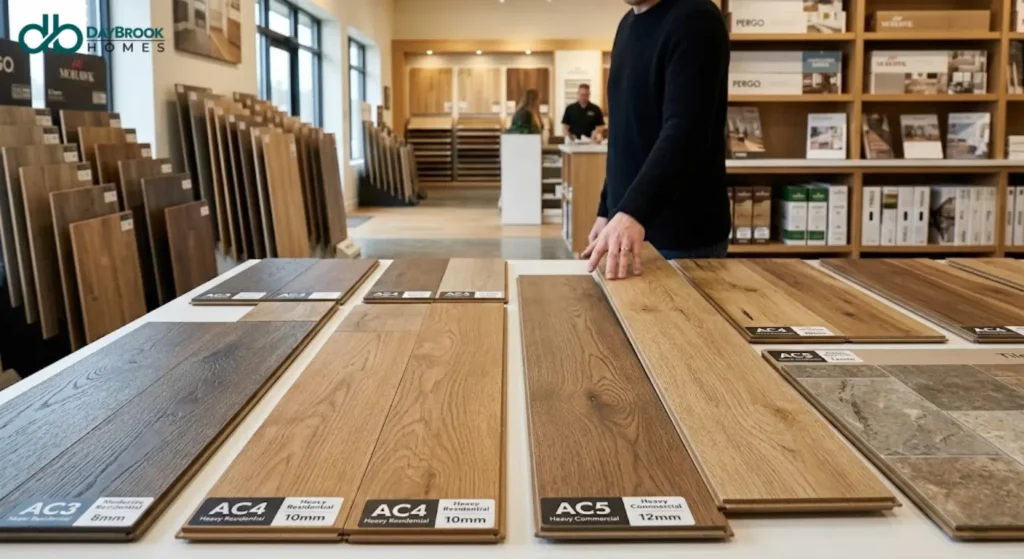
You’ve got choices. Lots of them. Think about where you’re putting it.
- AC Rating: This is important. It tells you how durable the laminate is. AC1 is a light residential (like a bedroom). AC5 is heavy commercial (think department store). For most homes, AC3 or AC4 is fine.
- Brands: You’ll see names like Pergo laminate flooring and Mohawk laminate flooring. They’re popular. Good quality. But many brands offer solid options.
- Thickness: Thicker planks (10-12mm) feel more substantial. They might cost a bit more. But they often sound better underfoot.
- Look and Feel: Do you want laminate wood flooring? Or maybe a stone tile look? Click-lock planks are standard now. How to install click lock laminate flooring is pretty universal across brands.
Tools You’ll Actually Need
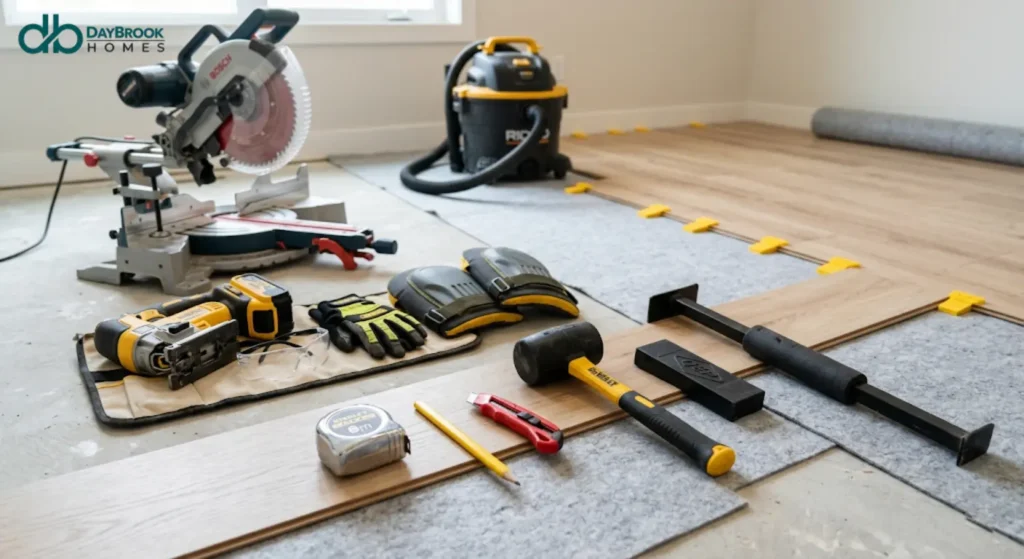
Don’t go crazy buying every tool. But you need the right ones.
- Tape Measure & Pencil: Obvious, right?Utility Knife: For cutting underlayment.
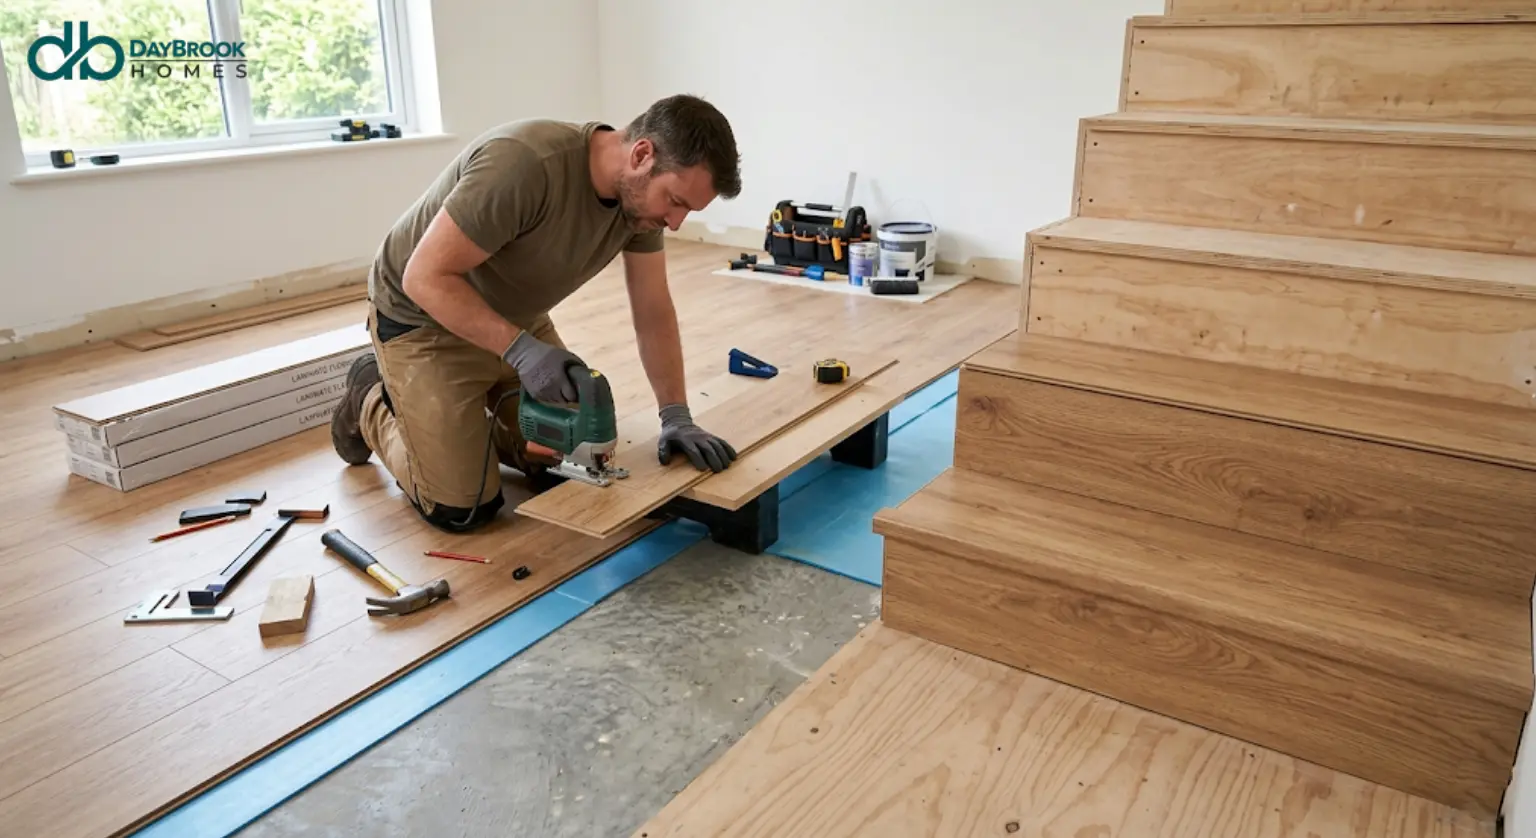
- Miter Saw or Jigsaw: For cutting planks. A miter saw is faster for straight cuts. A jigsaw is for tricky shapes.
- Tapping Block & Pull Bar: These help you click planks together tightly. Without damaging them.
- Rubber Mallet: To tap the tapping block.
- Spacers: Keep a gap between the floor and walls. Laminate needs room to expand and contract.
- Safety Gear: Gloves, safety glasses, knee pads. Protect yourself.
- Vacuum: You need a clean surface. Always.

Don’t Skip This Step!
Laminate planks need to get used to your house. Its temperature. Its humidity. Bring the boxes inside. Lay them flat in the room where they’ll be installed. For at least 48 hours. Some brands say 72 hours. Check the instructions. If you don’t, your floor could buckle or gap later. This is a common mistake. Don’t make it.
Subfloor Prep (This is HUGE)
Your subfloor is everything. If it’s bad, your new laminate floor will be bad. Guaranteed.
All About Underlayment: Your Floor's Cushion
You need how to install underlayment for laminate flooring. Almost always.
- Vapor Barrier: If you’re on concrete, you need a vapor barrier. This stops moisture. Crucial.
- Sound Dampening: Underlayment makes the floor quieter. Less hollow-sounding.
- Leveling: It can help with minor subfloor imperfections. Not major ones.
Lay the underlayment. Don’t overlap it too much (check product instructions). Tape the seams.
Level and Clean
Your subfloor needs to be:
- Level: Super important. Use a long level (6-foot or more). Any dips or humps over 1/8 inch within 10 feet? You need to fix them. For concrete, use a self-leveling compound. For plywood, sand down high spots, fill low spots.
- Clean: Vacuum. Get every speck of dirt, dust, and debris. Any tiny pebble can cause a squeak or bump later.
How to Install Laminate Flooring on Concrete: A Solid Start
Concrete subfloors are common. Especially in basements or ground floors. They need special attention.
Moisture is the Enemy: Vapor Barrier is a Must
This is not optional. Concrete always has some moisture. Even if it feels dry.
- Plastic Sheeting: A 6-mil poly plastic sheeting is standard. Overlap seams by 6-8 inches. Tape them tight with waterproof tape.
- Run it Up the Wall: Extend the plastic up the wall a few inches. You’ll trim it later. This creates a full moisture barrier.
- Integrated Underlayment: Some underlayments have a vapor barrier built in.
Check the packaging carefully. But often, an extra layer of plastic on concrete is a good idea.
Laying the Planks on Concrete
Once your subfloor is prepped and the vapor barrier is down:
- Starting Wall: Pick your longest, straightest wall. This is your starting point.
- First Row: Lay the first plank. Use spacers along the wall. Leave a 1/4 to 3/8 inch expansion gap. This gap is critical.
- Click and Lock: Connect the next plank to the first. Angle it, push down, it should click. Use a tapping block and mallet if needed.
- Stagger Joints: Don’t line up your end joints. Make sure they’re staggered. At least 6 inches. This makes the floor stronger. And it looks better.
- Cutting Last Plank: When you hit the end of the row, measure. Cut the last plank. The leftover piece can often start the next row. As long as it’s long enough.
How to Install Laminate Flooring on Plywood: A Common Scenario
Plywood or OSB subfloors are typical upstairs or in older homes. They have different needs than concrete.
Subfloor Condition: Check for Damage
- Loose Boards: Nail down any loose plywood sections. Squeaks now mean squeaks later.
- Damaged Areas: Replace any water-damaged or rotting plywood. Don’t lay laminate over bad wood.
- Cleanliness: Again, sweep and vacuum thoroughly.
Underlayment for Plywood
You still need underlayment.
- No Vapor Barrier Needed: Unless you’re in a high-humidity area or the room has specific moisture concerns, a vapor barrier isn’t usually needed over plywood.
- Sound/Cushioning: Choose an underlayment for sound dampening and minor subfloor leveling.
- Lay it: Roll it out. Don’t overlap if instructions say not to. Tape seams.
Laying the Planks on Plywood
The process for laying planks is very similar to that of concrete once the subfloor is ready.
- Starting Point: Start along the longest wall.
- Expansion Gap: Use spacers for that 1/4 to 3/8 inch gap.
- Clicking: Angle, push, click. Use your tapping block and pull bar.
- Stagger: Keep those end joints staggered. It’s about stability and appearance.
How to Install Laminate Flooring on Stairs: The Trickiest Part
This is where things get fiddly. Stairs are not a beginner-friendly project. But it’s doable. Just needs precision.
What You'll Need (Extra Tools)
- Stair Nose/Tread Pieces: Laminate companies make special pieces for stair edges. You NEED these.
- Contact Adhesive/Construction Adhesive: For securing planks and nosing.
- Caulk Gun: For the adhesive.
- Pneumatic Brad Nailer (Optional but helpful): For extra security on nosing.
Removing Old Tread & Risers
If you’re replacing old carpet, rip it out. If you have old wooden treads and risers, you might need to remove them. Or just level them.
- Clean: Get rid of all old glue, staples, and debris.
- Level: Sand or fill any unevenness. Stairs must be flat.
Step-by-Step for Stairs
You generally work from the top down or bottom up. Many prefer top-down for less traffic on newly installed pieces.
- Measure Each Tread & Riser: This is critical. Stairs are rarely perfectly uniform. Measure each one. Don’t assume.
- Cut Laminate: Cut the laminate plank to fit the vertical part (riser). Leave a tiny gap at the top and sides for expansion.
- Tread: Cut the laminate plank to fit the horizontal part (tread). It should meet the bottom of the stair nose.
- Install Risers First (Usually): Apply construction adhesive in a wavy pattern to the back of the cut riser piece. Press it firmly into place.
- Install Treads Next: Apply adhesive to the sub-tread. Press the cut laminate tread piece into place. It should butt up against the riser.
- Install Stair Nose: Apply adhesive to the stair nose piece. Position it carefully. It overlaps the edge of the tread. Tap it gently with a mallet and a tapping block.
- Optional: Use a brad nailer (with very small nails) for extra hold. Be careful not to split the laminate. Fill nail holes later.
- Repeat: Go to the next step. Take your time. Precision is key.
Common Questions: Your Laminate FAQs Answered
Alright, let’s hit some of those burning questions about this project.
How Long Does It Take to Install Laminate Flooring?
This depends a lot. A small, empty, rectangular room? Maybe a day. A whole house with lots of cuts and doors? Multiple days. Stairs? Add a whole extra day or two for those.
- Average Room (150-200 sq ft): 1-2 days (including prep).
- Whole Floor (800-1000 sq ft): 3-5 days.
- Stairs (12-14 steps): 1-2 full days for just the stairs.
How Much Does It Cost to Install Laminate Flooring?
This is a two-part answer: DIY or professional.
DIY Costs:
- Laminate Planks: $1.50 – $5.00+ per square foot. High-end can be more.
- Underlayment: $0.20 – $0.70 per square foot.
- Tools: $50 – $200 (if you need to buy everything).
- Stair Nosing: $20 – $50 per step. Ouch.
So, for a 500 sq ft room, expect $850 – $3000+ for materials.
Professional Installation Costs: How Much to Install Laminate Flooring Per Square Foot?
This is where you ask how much per square foot to install laminate flooring. Or how much is labor to install laminate flooring?
- Labor Only: $2.00 – $8.00+ per square foot. This varies widely by region and project complexity.
- Total Installed (Materials + Labor): $4.00 – $13.00+ per square foot.
- Stairs: Professionals often charge per step. Expect $30 – $100+ per step, just for labor. It’s time-consuming.
So, for that same 500 sq ft room, professional installation could run $2000 – $6500+.
How Much Should I Charge to Install Laminate Flooring (If You're the Installer)?
If you’re doing this professionally, your price needs to cover your time, expertise, and overhead.
- Hourly Rate: Calculate what you need to make.Per Square Foot: Often $2.00 – $5.00 for straightforward rooms. More for complex layouts.
- Extra Charges: Stairs, tricky cuts, demolition of old flooring, subfloor repair, moving furniture. These all add to the cost. Don’t undersell your work.
How to Install Laminate Flooring for Beginners?
Start small. A closet. A spare bedroom. Get a feel for the click-lock system. Practice cutting. Understand the expansion gap. Don’t tackle a huge living room or stairs as your first project. Seriously, watch videos. Read your specific laminate instructions. They vary.
How to Install Laminate Flooring in Bathroom?
Putting laminate in bathrooms usually isn’t the best idea. I mean it. It cannot stand any standing water at all. Water just sneaks right into the cracks, makes the core puff up, and then boom, your floor is ruined. But if you’re totally set on it, make darn sure you pick a laminate that’s truly water-resistant. They often say “waterproof.” Then, seal every edge with silicone caulk. Just know it’s a gamble. Use it at your own risk. Tile or luxury vinyl plank (LVP) is a better bathroom choice.
How to Install Glueless Laminate Flooring?
Most modern laminates are “glueless.” It means the planks click together without glue. The term just refers to the locking mechanism. Our whole guide focuses on this type. You still use adhesive for stair nosing, though.
How Much Does Lowe's Charge to Install Laminate Flooring?
Lowe’s and Home Depot often offer installation services. Their costs typically fall within the professional installation ranges mentioned above. They usually charge by the square foot for labor, plus materials. They might have a minimum project fee. Always get a detailed quote.
Final Thoughts: Taking the Plunge with Laminate
Here is the deal with laminate in bathrooms: generally, it’s a hard pass. It absolutely can’t stand water sitting on it. When that happens, water seeps into the seams, the core swells up, and poof, your floor is ruined. If you absolutely insist, then you have to get the specially marked “water-resistant” stuff. And you better caulk every single edge with silicone. Still, you’re playing with fire a little, honestly.
You’ve learned how to install laminate flooring across different surfaces. You know how much it can vary wildly to install laminate flooring. And you’ve got the steps down. Take your time. Don’t rush. And when it’s all done, step back. Enjoy your new floor. You earned it.
Taking on a big flooring project can feel overwhelming. You’ve got to plan, measure, cut, and pay attention to every detail. It’s a lot of work, but the payoff is huge. A fresh, durable floor can change the whole feel of a room. It adds real value to your home.
Frequently Asked Questions
How hard is it to install laminate flooring for a beginner?
It’s manageable for beginners, but start with a small, simple room before tackling complex areas or stairs.
How to install laminate flooring on concrete properly?
Always use a 6-mil plastic vapor barrier, even with integrated underlayment, to prevent moisture issues.
What's the trickiest part when learning how to install laminate flooring?
Installing laminate flooring on stairs is the most challenging part due to precise cuts and nosing.
How much to install laminate flooring per square foot yourself?
DIY costs for materials (planks, underlayment) typically range from $1.70 to $5.70 per square foot.
How much does it cost to install laminate flooring if I hire a pro?
Professional installation, including labor and materials, usually runs $4.00 to $13.00+ per square foot.